Now a Days, The computer age has taken pattern drafting from home to a whole new level. Digital pattern software is definitely an easier and cleaner way to create patterns.... None the less, I am an Old School Girl,... in a very literal fashion. I learned to draft by hand way back in the days of disco and bell bottoms, and it remains my passion, in part because it seems to be a bit of a dying art. So, in a modern world exploding with all sorts of cool cybergenic precise options, I'm going to share a bit about the process of dusting off one of my old studio patterns and turning it into a multi sized, (still hand drafted), pattern with complete instruction tutorial ready for digital download. (ah hummmm, a little disclaimer, I do love to teach, but for now, I am just going to share the "Process" - from tissue paper to digital download sprinkled with a bit of the thoughts in between, and save the Principles of Old School drafting for another day.)
This is the pattern tutorial I am working on right now. It is a cute and simple Tunic Top pattern that I have been using for years. Here is the original pattern piece. I have no idea how long this has been in my pattern box, but I am going to venture to say at least 15 years. I think it was from a pixie costume, but it ended up being a really cute and easy top that I have made many, many times for lots of different projects.

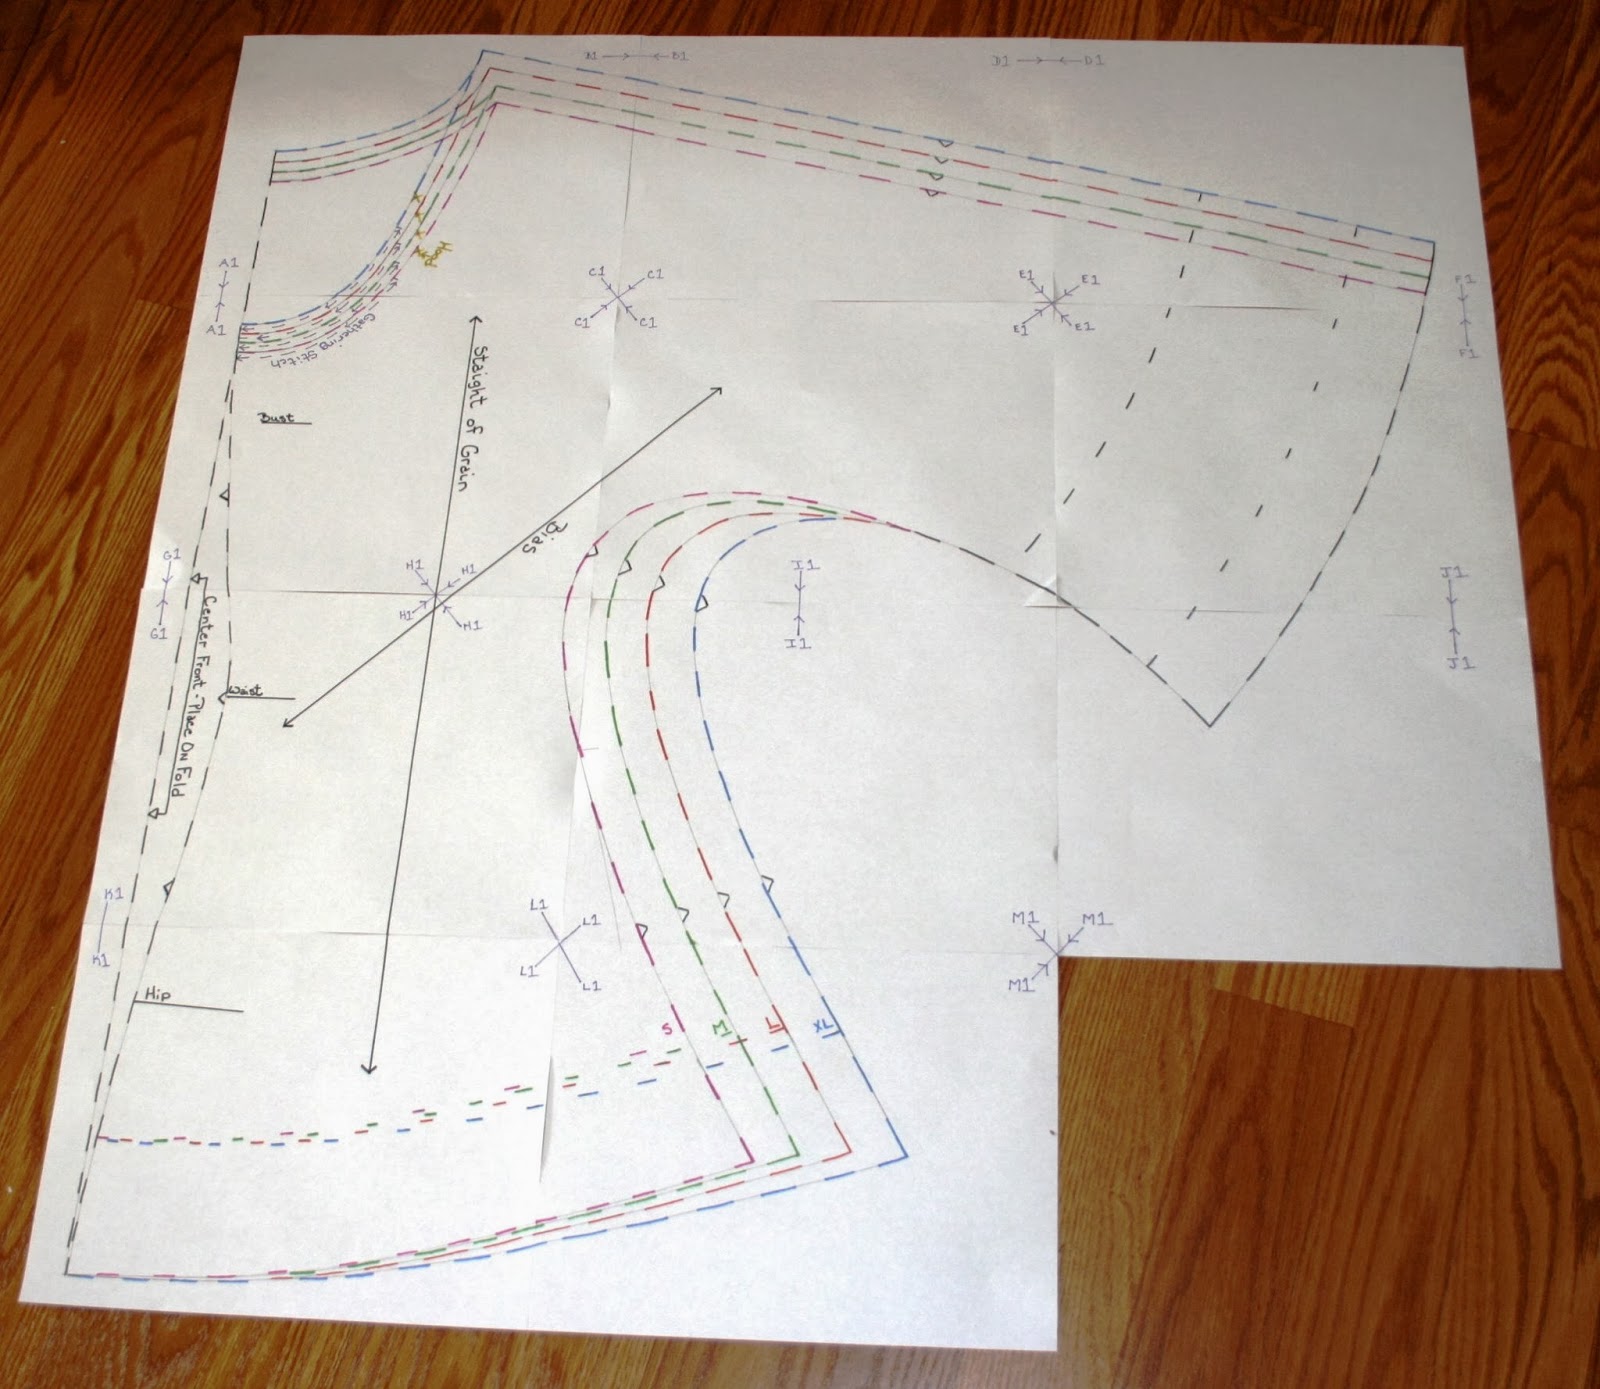
This is the original pattern where I made it into a multi sized pattern for a different costume project. As you can see, it has been well loved, but pretty well preserved I must say.

One of the reasons I chose to make this pattern into a tutorial is because it is simple to make and it only has 2 main pattern pieces. It is really versatile and easily changed for a lot of different looks. But, the main reason I chose to convert this pattern for digital download is because of the skills I wanted to teach in the tutorial. In the finished tutorial I will show several ways to change the pattern and create different looks from this simple 2 piece pattern.
So here is the freshened up draft. I have made a few changes to the original pattern draft to make it a bit more yardage friendly. Here is what the pattern for the tunic top looks like now. These pieces are ready to be scanned and uploaded to a PDF.


No comments:
Post a Comment